Eagle_Eye
|
![[*]](./images/ultragrey/default_icon.gif) posted on 14-1-07 at 13:12 posted on 14-1-07 at 13:12 |
|
|
How To Create The Perfect Med Pic
This Tutorial can also be found on out php page..
How to Create the Perfect Med Picture
Well, some of you may know, I did a lot of med pics for the BHD EXP release some time ago, and, since then, a lot of mods have come out, for BHD, JO
and DFX.
The thing I always take a look at is the med pics, because they need to match a certain criteria...most of them fail in my opinion..
That is..
1: be pcx format
2: be 200 x 200 pixels
3: be 8bit format
They need to be clear, and not surrounded by things like terrains etc..
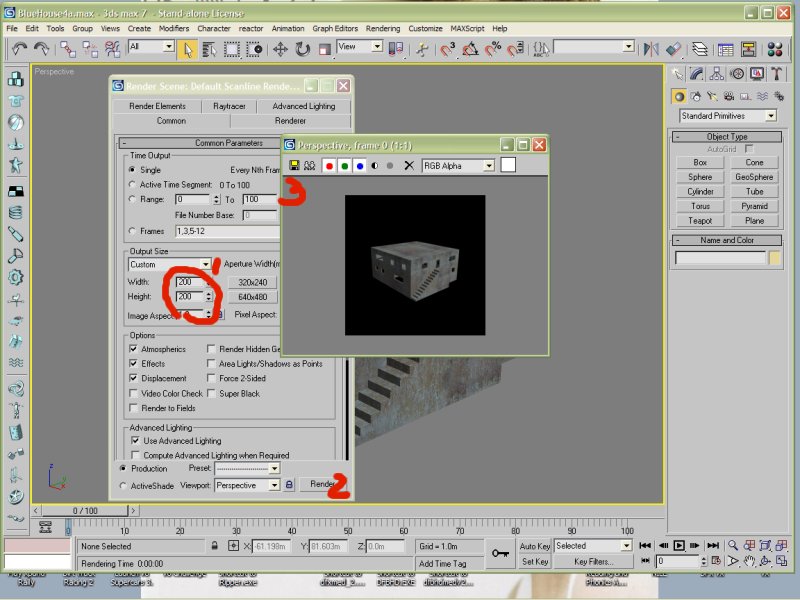
Ideally, if you created the item yourself, you can create the initial screenshot from Max..
Bring you model up in a close zoom..press F10 to render.
1: Adjust the output size to 200 x 200
2: Press Render
3: Save the pic
Proceed down this tut to converting to 8 bit
That's why I'm going to show you my little secret..
I figured this back with the BHD EXP project..
You will need Paint Shop Pro, because I find it easier to use for this particular task.
I have a demo version for download (it happens to have a crack to remove the trial !! LOL )
Click Here for PSP & Trial Version
First of all, let me explain the main trick..stay with me now..
Fact..A tunnel section turns of the voxels when your inside it.
What this means: It turns of the terrain..
What this means for us..: When we stand inside a tunnel piece on the surface, the terrain is removed..then we can see the whole object, even what's
under the surface of the terrain..
OK, you with me now !?
The trick to getting the perfect med pic, is taking the screen shot while standing inside a tunnel piece.
|
|
|
Eagle_Eye
|
![[*]](./images/ultragrey/default_icon.gif) posted on 14-1-07 at 13:55 posted on 14-1-07 at 13:55 |
|
|
Setting Up The Med
Ok, I'm going to use the DX Med for JO:E.
I have installed the med.pff file that is available for download, and must be installed before you use the DFX Med with JO, or you will get a text
string error.
I'm going to create 3 med pics, for items that where missing in this set when we moved the med.pff to JO. (this has since been done, and posted, but
we're doing this for the exercise)
Open your med, choose a flat terrain, place a start marker, SP or Coop, etc, it doesn't matter..
For JO and DFX, go to Buildings, and select the tunnel piece DlabT7, it's the 4 way intersection. I'm going to place 3, 1 for each of the 3 items I
need a pic for.


Now, I'm going to place 3 more items, the one I need pics for..
I_lfpB, Imwall01 and Imwall02 these are the names of the 3di file for the items, and can be found down the left side of the item description in the
insert item mode..

Zoom in a bit, and move your items to about the same place as mine..
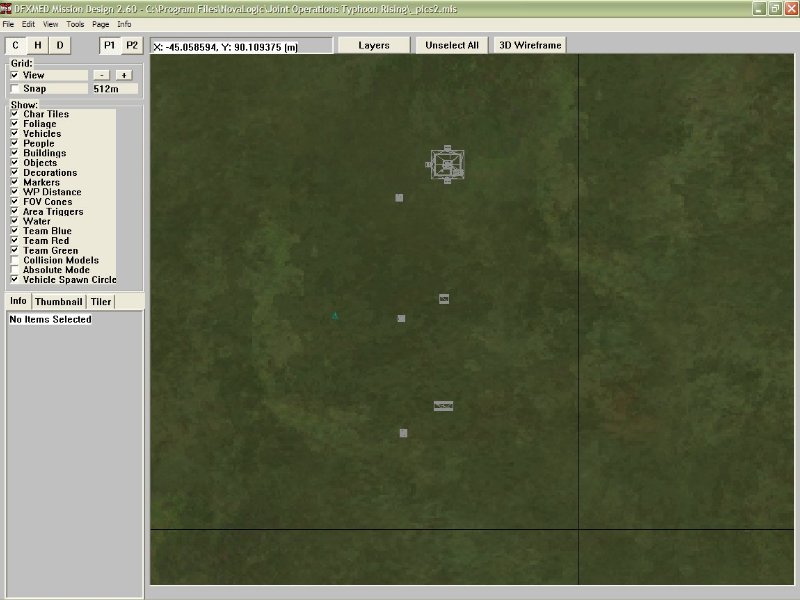
Your now ready, save off your mission, and export to bms.
|
|
|
Eagle_Eye
|
![[*]](./images/ultragrey/default_icon.gif) posted on 14-1-07 at 14:08 posted on 14-1-07 at 14:08 |
|
|
Setting up the Graphics in your game
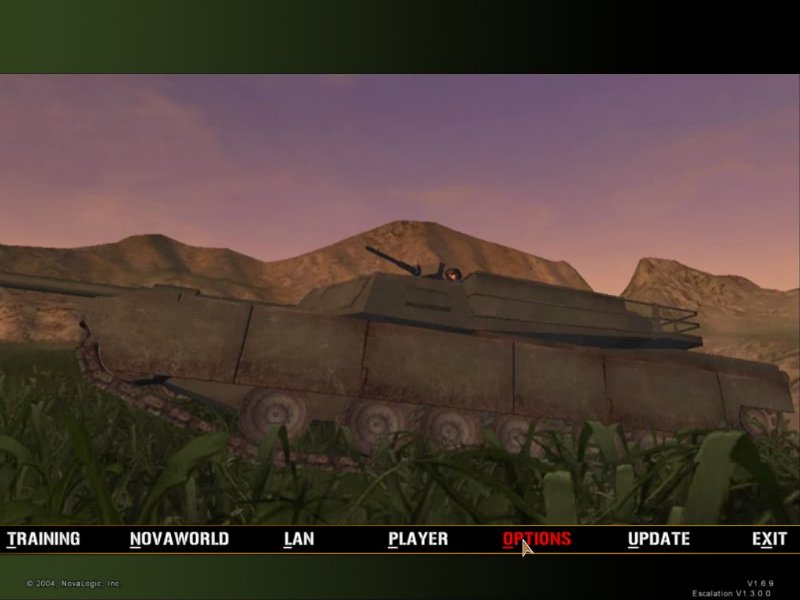
OK, if you have a problem where your sky goes all up the creek, shudders and does weird things, then you need to turn off the frame effects, if you
don't, you will get bad results, open JO or DFX and Turn off the frame effects, DFX is in the same place as JO.
If your running higher than 1024 x 768, reduce it now to this size, or your screen shot may NOT be taken, and will NOT be saved into your
directory.

|
|
|
Eagle_Eye
|
![[*]](./images/ultragrey/default_icon.gif) posted on 14-1-07 at 14:21 posted on 14-1-07 at 14:21 |
|
|
Taking the Screen Shot
Run your mission..
(Remember to reduce your screen size to 1024 x 768 or below, or your screen shot may not work, you can do this in the game - BHD/options/general -
JO/DFX Options/Video Tab)

Now, we need a clean shot, so turn off your weapon, hit F2

Turn off your hud detail, press F6 3 times to get to the lowest setting which is none at all..
BHD, use the "H" key

Now, run over and step into the tunnel section..line up with your building, then jump in LOL..


BINGO..instant transformation..
If you haven't got a clear view, move around a bit, there's a fair range of movement inside it to get a better angle..
Take your screen shot with the F11 key.
Move to the next two, and take a shot of each..


You can now leave the game.
|
|
|
Eagle_Eye
|
![[*]](./images/ultragrey/default_icon.gif) posted on 14-1-07 at 14:30 posted on 14-1-07 at 14:30 |
|
|
Creating the Actual Pic
OK, please make sure you have installed PSP7 for this part of the tut, the link is above, in the first post.
Open PSP 7, and load your 3 Screen shots from your JO Directory..you can load all 3 at once, using the ctrl key as you click on each one..

Now, if you took 3 pics like I did, bring the one with the lowset number to the front by clicking on it, this is the shot you took first.

Select the Crop Tool, and Draw a Square around your item, try and keep it as square as possible, keeping in mind we will trim this shortly, so don't
crop too close..

Select Image/Crop from the pull down Menu, or Shift+R to crop the picture.

Now, from the pull down menu, select resize

Now, looking at this popup, there is width and height, if you have a good eye, these will be pretty close, maybe the same if your lucky..
One is usually smaller than the other, using the little up and down arrows, on the one that is SMALLEST, raise or lower the value to 200, then hit
OK..

You can use the magnify to get the pic back to it's full size, now almost 200 x 200.

Next,pull down Image?Canvas Size.

Make both of the Height a width to 200 each..this will be set for the next one, it keeps the last setting used as a default.

Converting to 8 bit color
Now, we need to drop the colour..here's why, in the screen shot below, are 2 files, they are the same 200 x 200 pic, one is reduced in depth, one is
not.

As you can see, one is 105k, one is 14k, that's about 15% of the original size.
Imagine 1000 pics at 105k and 1000 pics at 14k, that's 105 meg, 14 meg, I know what I'd rather be downloading with my Mod !!
Now, to reduce the Colour, from the pull down, select..
Colors/Decrease Color Depth/256 8 bit

When this comes up, just click OK..

Your now ready to Save..
|
|
|
Eagle_Eye
|
![[*]](./images/ultragrey/default_icon.gif) posted on 14-1-07 at 15:01 posted on 14-1-07 at 15:01 |
|
|
Saving your creation !!
OK, first, you need to know what to call your file.
As Stated above, you can get this name from the Med. You can load your mission back in, and check what it's called, remembering which item you took
the first picture of..
Sometimes, when creating a pick of an existing item, it's hard to tell between I and l , so you may have to decrypt the items def, and take a look in
there for the correct syntax.

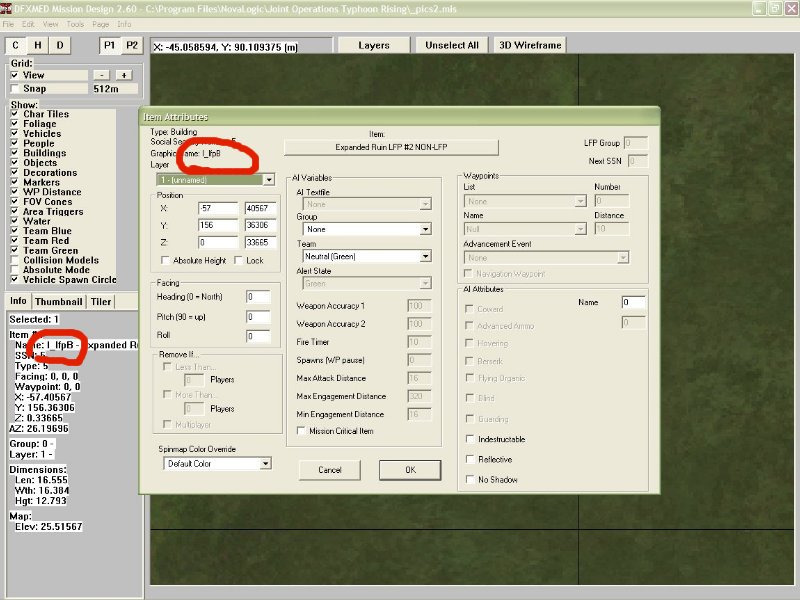
OK, select "Save As" from the "File" Pull down Menu, from the popup, select the file type using the pull down, select Zsoft paintbrush (pcx)
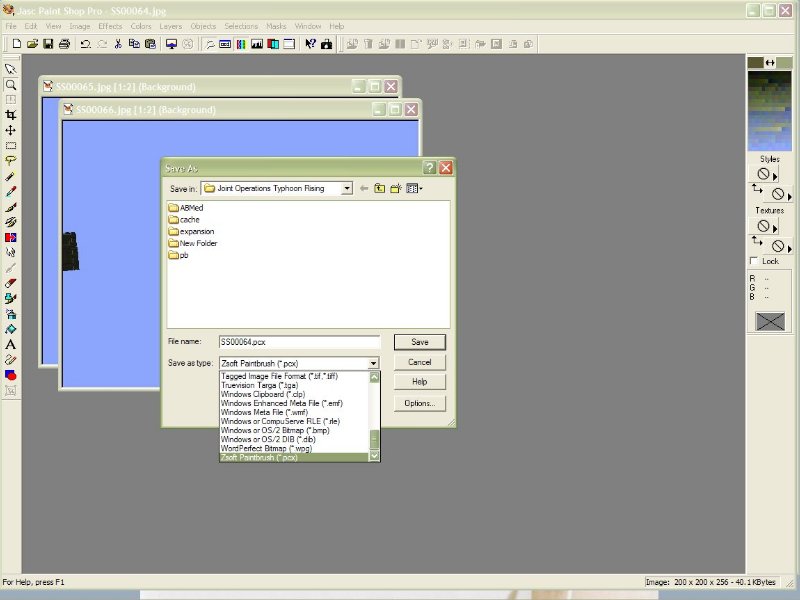
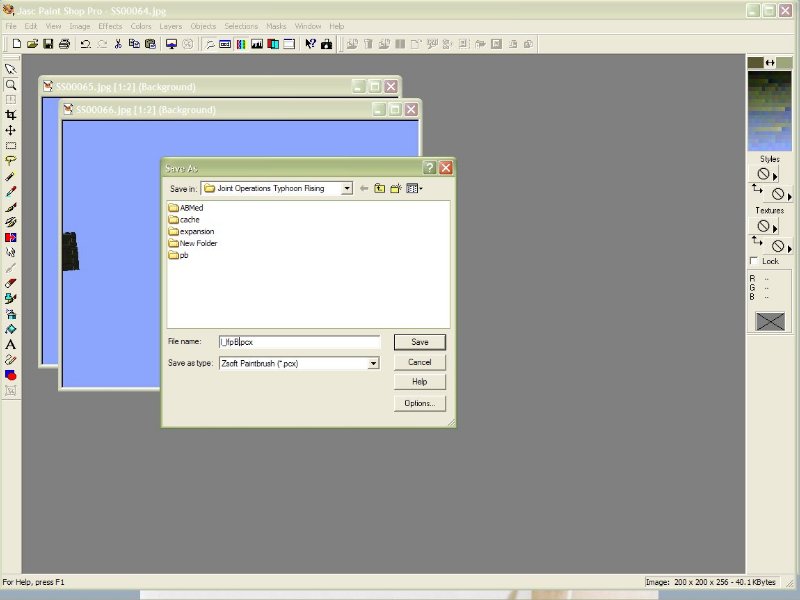
Type in the name of your item, and save.
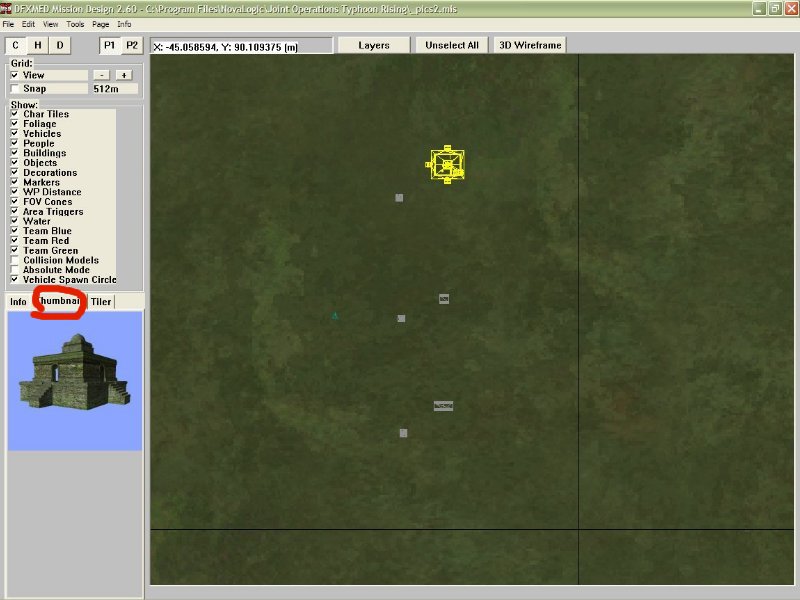
Load your mission back into the med, select the item you just did the pic for, then, on the left of the window, select "Thumbnail"..you pic should
be there.
EE
|
|
|
Iceman
|
![[*]](./images/ultragrey/default_icon.gif) posted on 15-1-07 at 15:36 posted on 15-1-07 at 15:36 |
|
|
Cool tut bro
send me the file and I will make a PDF file for download section
Iceman
|
|
|
JET
Gomer !!!
Posts: 827
Registered: 7-4-06
Location: Northern California
Member Is Offline
Mood: Need a Beer
|
![[*]](./images/ultragrey/default_icon.gif) posted on 16-1-07 at 15:14 posted on 16-1-07 at 15:14 |
|
|
The use of tunnels does not work in DFX. it does remove the terrain, but it doesnt make it where you can make a SS either.
Ive got an additional tip for using PSP to do this if you have lot of pics to do.
right click on the toolbar anywhere between buttons. (I.E. Undo and Redo) select customize on the bottom. select the "Resize" in the left side
window. select a spot on the right. click the add button in the middle. now find and select "Decrease Colors to 256" click the add button again,
select "Change Canvas Size"click the add button again. click close when done.
But yet again theres an even quicker way to do this by not using crop. say have the "Selection" tool ready make sure in "Tool Options" its set for
sguare.
pick a spot on the pic, right click and drag. now copy, then paste as "New Image" select "Resize" make it 200x200, "Reduce Colors to 256" "Save
As" once you get the first done, the settings will be the same for all next until you change them.

Give a man a fish and he will eat for a day. Teach him how to fish, and he will sit in a boat and drink beer all day. --George Carlin |
|
|
Eagle_Eye
|
![[*]](./images/ultragrey/default_icon.gif) posted on 16-1-07 at 17:06 posted on 16-1-07 at 17:06 |
|
|
| Quote: | Originally posted by JET
The use of tunnels does not work in DFX. it does remove the terrain, but it doesnt make it where you can make a SS either.
|
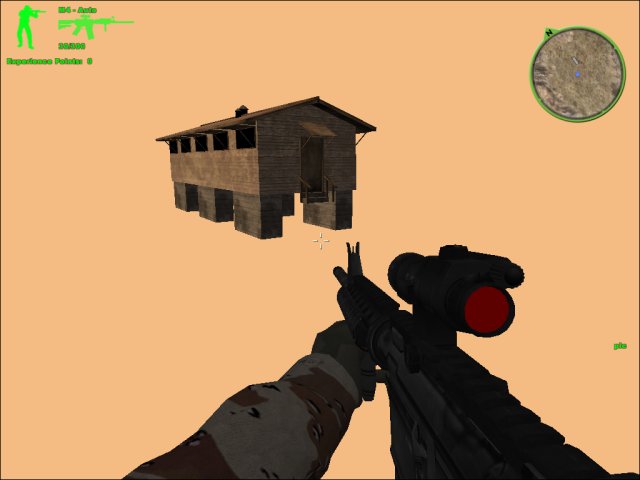
OK, you lost me Jet..why doesn't it work ?!
I just took this in DFX, I didn't trun off the weapon or hud so you could see that it was taken in DFX..
If your game is not saving the screen shot, then you need to reduce your screen size in the Graphic Setup of the game..as mentioned..
| Quote: | Originally posted by Eagle_Eye
Setting up the Graphics in your game
If your running higher than 1024 x 768, reduce it now to this size, or your screen shot may NOT be taken, and will NOT be saved into your
directory.
|
There are many ways to do create the actual pic, and many features of many different programs that can make it a little easier if your doing a lot of
them, the main thing is the end product should be 200 x 200 @ 8bit color (256 colors)
|
|
|
Eagle_Eye
|
![[*]](./images/ultragrey/default_icon.gif) posted on 16-1-07 at 17:36 posted on 16-1-07 at 17:36 |
|
|
This one is from BHD, using the end cap raised to ground level to stand in.
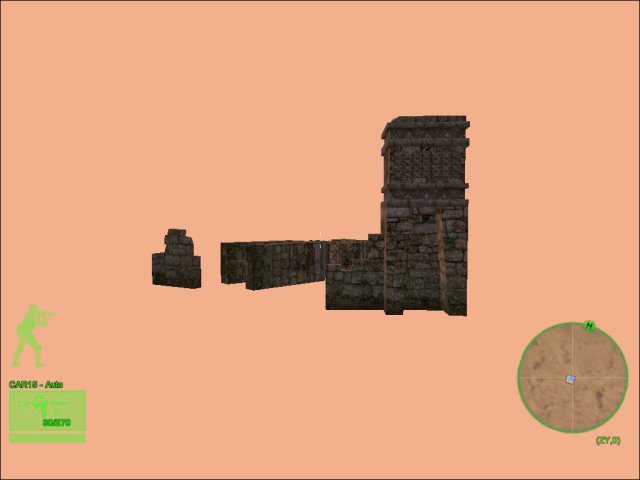
Use F2 and H to remove weapon and Hud Detail
|
|
|
JET
Gomer !!!
Posts: 827
Registered: 7-4-06
Location: Northern California
Member Is Offline
Mood: Need a Beer
|
![[*]](./images/ultragrey/default_icon.gif) posted on 17-1-07 at 04:23 posted on 17-1-07 at 04:23 |
|
|
I am running at 1024x768,
heres 2 SS of the Special Ops Yellow buggy before the tunnel and after.
before
after
as you can see it looks like hell and DFX has always rendered like this in a tunnel, i thought it was supposed to considering it hides poor alignment
in tunnels, you know the black line on the corners if your 1-2 pixels off.

Give a man a fish and he will eat for a day. Teach him how to fish, and he will sit in a boat and drink beer all day. --George Carlin |
|
|
Eagle_Eye
|
![[*]](./images/ultragrey/default_icon.gif) posted on 17-1-07 at 04:40 posted on 17-1-07 at 04:40 |
|
|
Walk through to the other side of the tunnel..there's a fair range of movement inside it to get a better angle..
I'll edit the tutorial, and mention this..
Another tip..
Change the enviroment name, and the background color will change, most of the named ones, like c3.., c5 etc will give shades of browns, and the ones
starting with full.., will give shades of blue..
|
|
|
JET
Gomer !!!
Posts: 827
Registered: 7-4-06
Location: Northern California
Member Is Offline
Mood: Need a Beer
|
![[*]](./images/ultragrey/default_icon.gif) posted on 17-1-07 at 05:29 posted on 17-1-07 at 05:29 |
|
|
ok heres a better shot of what i get when i go into tunnels:

good knowledge on changing the environment.

Give a man a fish and he will eat for a day. Teach him how to fish, and he will sit in a boat and drink beer all day. --George Carlin |
|
|
Eagle_Eye
|
![[*]](./images/ultragrey/default_icon.gif) posted on 17-1-07 at 13:15 posted on 17-1-07 at 13:15 |
|
|
OK, did you see the the bit above...?
| Quote: | Originally posted by Eagle_Eye
Setting up the Graphics in your game
OK, if you have a problem where your sky goes all up the creek, shudders and does weird things, then you need to turn off the frame effects, if you
don't, you will get bad results, open JO or DFX and Turn off the frame effects, DFX is in the same place as JO.
|
EE
|
|
|
JET
Gomer !!!
Posts: 827
Registered: 7-4-06
Location: Northern California
Member Is Offline
Mood: Need a Beer
|
![[*]](./images/ultragrey/default_icon.gif) posted on 18-1-07 at 06:12 posted on 18-1-07 at 06:12 |
|
|
ok no i didnt see that, oops sorry but that is the problem.

Give a man a fish and he will eat for a day. Teach him how to fish, and he will sit in a boat and drink beer all day. --George Carlin |
|
|
|

